If at first you don't succeed....Try, try again!
This was the first time this has happened to me in refurbishing journey. It was bound to happen, but I wish it would've been something that I hadn't worked so hard on. A chevron pattern isn't easy to figure out, well at least not for me! I knew I was in trouble when I was finished and my Hubby said, "I think you need to add some more chevron stripes." Hmmmm where were you when WE were taping off these stripes?? I decided to ignore him (and my gut feelings) and just go with it. I blogged about the dresser and got lots of positive feedback and then it sat in my garage for 4 months. I was going to take it to the store I recently started selling in an give it a go there....That was until I spilled stain on the white paint. Another couple weeks of letting it sit then I decided what I wanted to do and went for it.
Here's a picture of the dresser before I did my chevron treatment to it.
This dresser was a complete mess. It was a smelly, ugly mess. I really didn't like the hardware or the painted and distressed finish.
This is how the dresser looked after I stripped and refinished the top and painted the body of the dresser in Pure White ASCP. Then added on some chevron stripes. The Hubby always said it looked like a Charlie Brown dresser....OH NO HE DIDN'T! Oh yes, yes he did! Looking back at it now, I kind of agree, but something about this little chevron dresser still makes my heart go pitter patter. I now realize however, that I should have taken the stripes down farther. Hindsight is 20/20, right? Lots of old school phrases in this post!
I went to an estate sale a couple of weeks ago and bought the most amazing vintage map print I'd ever seen. The colors were gorgeous and it was unique. I decided to attach the map to the drawer fronts on the chevron dresser. I measured my map and it was the perfect size. I got out my straight edge and then cut each piece carefully by hand. I sanded down the drawers a bit and grabbed my Mod Podge and brush. I attached the map to the first drawer and it was a disaster!! Everything was bubbling and not sticking properly. I used a brayer I had and tried to get the air bubbles out, but nothing worked. I walked away and let it sit for a day. I was gutted thinking this beautiful map was going to be wasted and all the time I spent preparing. The next day I went out and sure enough the drawer was a mess. I ripped it off (cursing under my breath) and then decided I had to come up with another plan. I went to Michael's and a nice employee there explained that it was probably too cold to be doing this outside and my Mod Podge was maybe too old. I purchased some new map paper, a new brayer and scraper thingy (no idea what it's called!) and new Mod Podge. It definitely pays to have the right tools.

I also decided to buy a paper cutter. I was tired of trying to cut a straight line on my own with scissors. I've never been the best at cutting, but I love my paper cutter! It makes cutting a breeze!!

This is before my second attempt at using Mod Podge on the drawer. I sanded the drawer down a bit more and put a bit more paint on to help the Mod Podge adhere.

I was thrilled when I got my first page on!! It was sticking and the brayer and scraper thingy (I need to learn the name for that!) took all the air bubbles out perfectly! Now I was getting excited!!

What I forgot to mention is it took me about 3 hours to attach these maps to the drawers. It was a fun, but challenging process. When I was done with attaching the maps to the drawers, I painted the body of the dresser as well as sanded down the top and re-stained it. I put clear wax on the body of the dresser, then finished it with dark wax. I also put a few coats of dark wax on the top as well as the drawers. I wanted the drawers to have an aged look. I popped on some new drawer hardware and stepped back to admire the 'new' dresser.
The best part of this whole process was Hunter telling me he wanted to keep the dresser and put it in his room. Tonight we moved the map dresser into his room. I didn't get any pictures of that, but he did say "Thank you Mommy for redoing my room." My heart melted. Love that kid!!
Here it is all done (hopefully for the last time). I didn't get any pictures of the dresser in Hunter's room though. I will have to save that for another day.

Please excuse these pictures. I love taking my pictures outside, but this piece was heavy and already inside so I had no choice. There was no way I could lift this out to my favorite spot in the yard. Even with spotlights (yep I used spotlights) these pictures aren't bright enough. This house is very dark even on a sunny day!
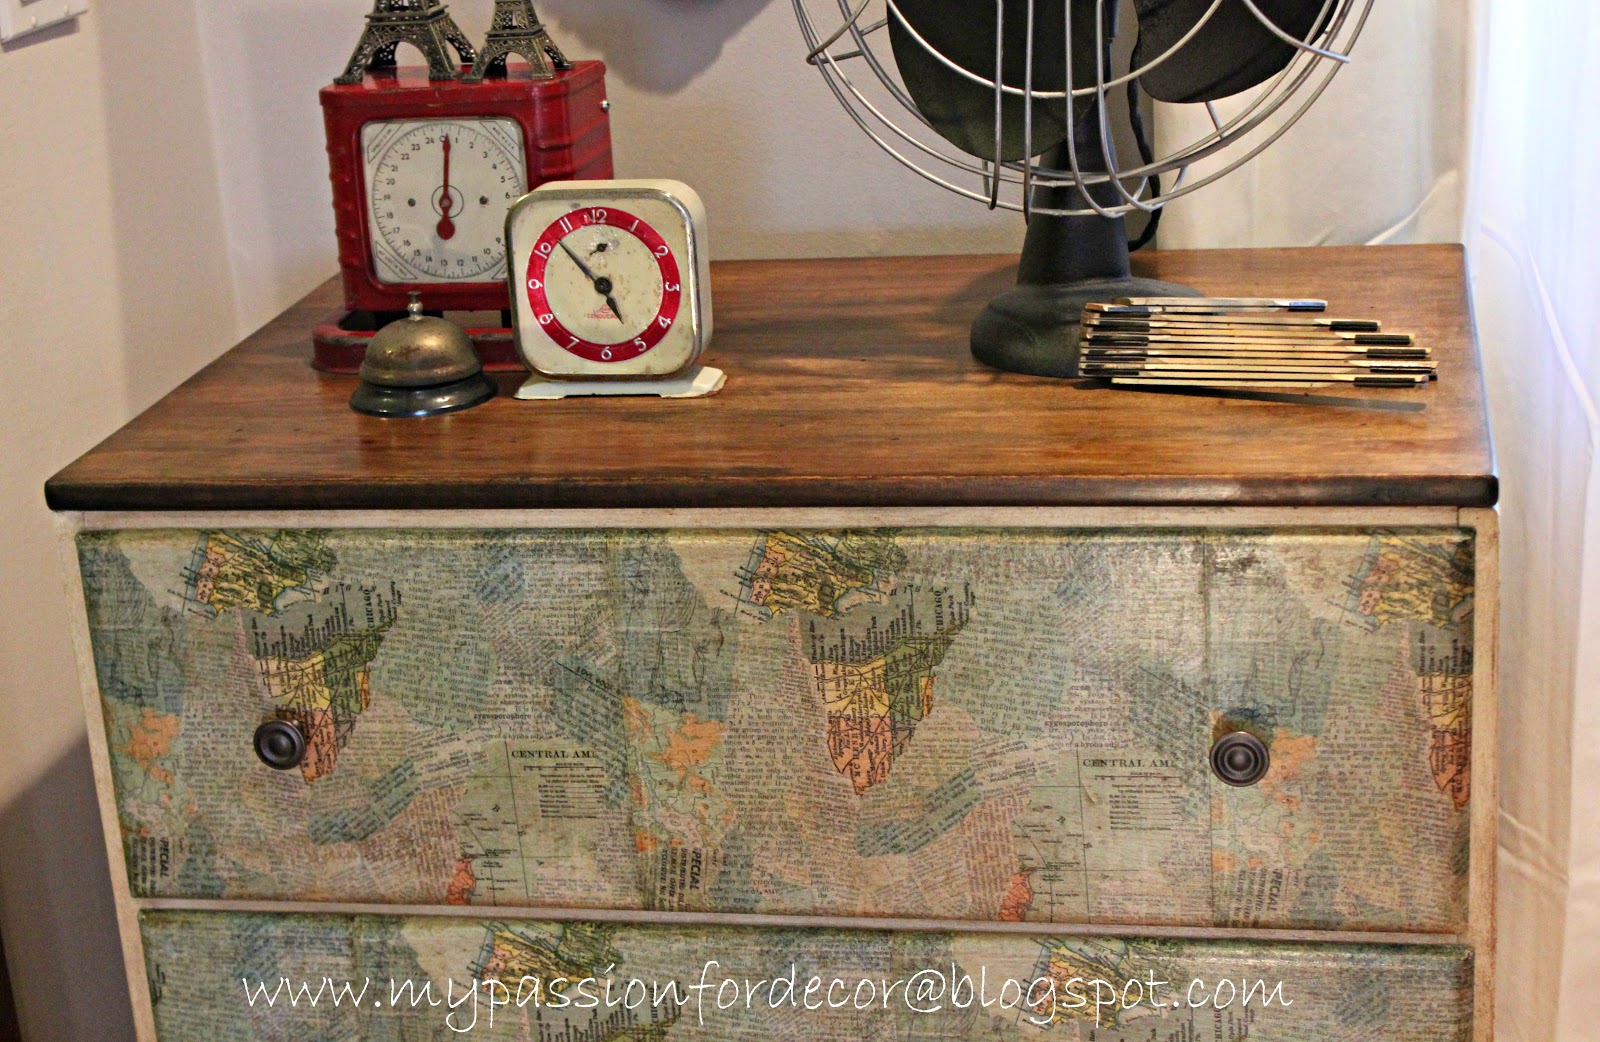
The pictures don't show how nice it is in person! I'm very happy with how it turned out. I love globes and maps so this is definitely right up my alley!

I like how aged and old the paper looks now with the Mod Podge and wax!


I have to mention this mirror. I bought this at a barn sale about a month ago. You can't see in the pictures, but it's highlighted with some almost pastel paints. I didn't do a thing to it other than clean it. The man that sold it to me asked me what I was going to do to it. How could I do anything to it? It's gorgeous the way it is. I haven't seen a mirror like this before. If you know what this type of mirror is called please let me know! Or what time period it's from.


I'm even so much happier with how the top looks now. I also learned that I really, really, really don't like staining :-)

This dresser has been a journey! I'm a very determined person and I knew this dresser could be so much better with a bit more work. This time when the Hubby looked at it he loved it. No more Charlie Brown dresser.
I'm happy this one went in Hunter's bedroom! I couldn't stand the thought of parting with it. I poured a lot of heart into this one and it's now another reminder to never give up and try, try again!!
Thank you for reading,
Melody